


By: Lisa & Dan Brown
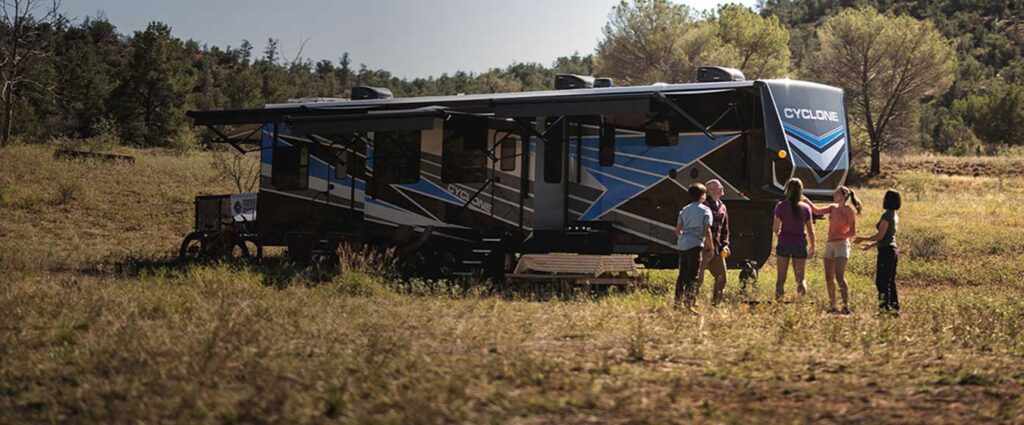
So recently, you’ve been to the big RV Super Shows. What did you think? They all had gorgeous new RV exterior paint schemes, new floor plans, cool tech options, fancy lighting featured and up-to-date fixtures, etc., didn’t they?
Now, for a moment, think of the one thing they all have in common that a lot can’t get past. I bet it didn’t take long for you to say ‘they all are brown, tan and bland’. Not taking sides but really, do you think manufacturers will be able to please every decorating preference? Oh, don’t get me wrong, some are awesomely beautiful and Heartland RVs, in particular, did a beautiful job in the Landmark 365’s, however…
….they’re still brown, dark and look like Rockefeller’s personal library and that’s simply not our style.
Now, I’m far from being a highly educated ‘Interior Designer’, but I surely know that browns and tans get boring fast and, well, it’s just isn’t our color. I never went to ‘design school’ (college) but I do know how the color wheel works so that should get my foot in the door, right? See, I’m a right-brain, creative type who can literally foresee the finished product. So, I went right to work.
The Planning
When we bought our brand new 5th wheel, it didn’t take me long to start perusing the Pinterest boards to get ideas. However, what we were seeing is the ‘white trend’. Cabinets are white. Bedding is white. Throw pillows are white. Floors are white. White, white, white…everywhere. DUDE! We have cats! We oftentimes boondock in the dust and dirt!
While they were beautiful, it just wasn’t our style and certainly wasn’t practical. We, instead, searched for splashes of color…lots and lots of color! And since we couldn’t find what we were looking for, we just created our own: ‘Key West Cottage’ but in our RV.
Our dream interior started with a simple 99 cent dish I picked up at WalMart. I loved the pattern and the colors were bold, bright and cheery. That was my starting point. I had my palette picked out.
At that point, I started our ‘project folder’ to hold all of our paint chips, fabric swatches, floor sample, catalog photos, receipts and order sheets all in one place.
Paint Primer
This is THE MOST IMPORTANT part of painting RV interior walls is you will NEED a paint primer. Learning from Landmark Adventures, David and Cheryl, we decided on the same primer they used; GLIDDEN GRIPPER PRIMER.
Glidden Gripper Primer is easily applied to surfaces and offers a smooth, even finish for topcoating. Available in both a white and grey base, the Primer ensures great hide no matter what color you select as your topcoat. (from their website)
We also decided to paint the ceilings, including the wood-grain light fixture thingies (whatever they’re called) and that ‘racetrack’ thing and the slide ceilings. The original ceiling was the same beige wallpaper that was on the walls. We wanted definition and to brighten up the room with a whiter overhead. We took down one of the ceiling louvered vent covers with us to color match so they blended right into the ceiling color.
WOW! Look, no more brown wood accents on the ceiling! It now looks like a craftsman cottage ceiling and if I say so myself, it looks custom and AMAZING! (Psssst, don’t cheat by looking at those paint colors just yet!)
Total Cost: $100 Glidden Gripper Primer for walls, ceiling tinted primer, small rollers, roller pan, paintbrush and Frog Tape.
Helpful hint: Don’t buy the big paint rollers. Opt for the skinny ones with a ?” nap. They won’t be as heavy and cumbersome while rolling the ceiling and walls. We bought one roller, one roller pan, and a package of six rollers for both ceiling and walls.
Wall Paint
With fabric swatches in hand, I trekked off to Lowe’s and The Home Depot to collect paint chips. I just grabbed…a huge stack of lime greens, sunny yellows, aquas, turquoises, melon oranges, poppy reds, and whites. I think I collected about the thickness of a standard bible. I know those stores hate that but whatever…
…once I got them back to our 350 square foot tiny house on wheels, I laid them all out on the galley counter and turned on the lights to get a better look. All those paint colors looked quite different under store lighting. Soon, my stack dwindled to about the thickness of my cell phone. I made paper airplanes out of the others for our cats to catch in the air. You should have seen it! Paint chip paper airplanes everywhere!
Anyway, I took the paint chips that I kept and stuck them everywhere on the walls in our galley and living room/den area. I wedged them under edges, behind mouldings and stuck them where the slides met the bulkheads. Needless to say, it looked like a toddler had a hay day all over the inside of our coach. Leaving them up for a week, I took mental notes of how they looked throughout the day in the sun, on cloudy days, when one set of lights on and when all the lights were on. The amazing thing about these two colors is they changed hues under different times of the day and daylight or indoor lighting. They were perfect!
We decided on Sherwin Williams colors; Cooled Blue SW6759 which resembled a aqua blue and Frolic SW6703 which resembled a lime margarita (did someone say ‘margarita’??).
However, even though those were Sherwin Williams colors, we bought Glidden paint (satin finish) and had them color-matched to the samples below because Glidden didn’t have the paint chip colors I wanted. Sticking with the Glidden brand would ensure proper adhesion with the Glidden Gripper Primer.
Total Cost: $80 Wall paint – Frolic Top Coat, Cooled Blue Top Coat (painting supplies already calculated and bought in preceding section)
Textiles
Not trying to confuse you, we bought our our window cornice board (window box valances) textile fabric BEFORE selecting our wall colors and purchased our paint,
Why, you ask?
It’s easier to match paint color to fabric than it is to match fabric to paint color.
So, I dragged my poor Dan to one of his least favorite stores; Joann Fabrics. Usually, he sits on the man-bench outside the store catching up on hockey scores on his phone while I shop. However, this time, I wanted him to be a part of this process because *gasp* well…he ‘does’ live in our home on wheels too. I told him if he was good, I’d treat him to ice cream later. It was probably the ONLY time he was receptive of even GOING in a fabric store.
See, Dan has decorating sense about the size of a pencil eraser. Now, I’m totally not dissing him; just showing this is not his strong suit. It’s just not his forte. But, keep reading because his work comes later (Oh boy, does it ever!).
After about an hour of perusing different fabrics, we finally agreed on three different fabrics for our cornice boards based on the ‘3 method’; one bold pattern, one single-color pin stripe and one single-color textured. We wanted everything in our coach to be cheery, fun, eye-catching, interesting and un-boring (if that’s even a word). By choosing three different fabrics helped us achieve that (check out the photos!).
I planned for leftovers; just in case something went terribly wrong like overstretching, ripping, holes, finding flaws in fabric pieces, or maybe to make Dan a pair of snazzy pajama pants. But seriously, my intention is to take some of the fabric into our sleeping quarters at a later date. I also snipped off a small square from each and put them into my wallet to carry with me for matching paint colors and accessorizing.
We had seven cornice boards to recover together. It’s a two person job; especially for the long ones. One would stretch and hold the fabric while the other would staple. By the grace of God and a miracle, we are still married! No stapled fingers…or lips! WHEW!
Joking aside, for this project, all we needed was a sharp pair of scissors, measuring tape and a staple gun with LOTS of staples. We also used a pair of pliers to pull out and remove any staples before proceeding with recovering.
Since I can’t wait to show you the finished products, here they are! You’ll notice that I didn’t feel comfortable nor wanted them to be two different colors/patterns each. I went for simplicity.
Helpful hint: Cover with easy patterns first before tackling fabric with lines or symmetrical patterns. That way, you’ll have mastered actually covering them before learning how to line dots and lines up on others.
Next, we chose not to replace our dining chairs because there was nothing wrong with them other than the ugly-to-me tapestry pattern. Instead, we purchased two IKEA HENRIKSDAL Chair Covers in Orrsta Light Gray. It was massive savings; each cover costing only $20 each! Dan just tacked them in place on the underside of the chairs to keep them from shifting. He just LOVES that staple gun!
They look awesome, don’t they?
Lastly, I needed to find covers for our two throw pillows that essentially became seat cushions for our two desk chairs (I’ll talk about those later). We found these awesome teal and white chevron pillow covers in the home decorating department of Hobby Lobby. They coordinated perfectly and added a splash of extra bold color and design. Oh, and did I mention that I bought them when they had their 50% off home decorating items?
Total Cost: $200 (fabric for cornice boards, pillow covers and chair covers. We already had scissors, measuring tape, staple gun and other tools)
Backsplash
Our original backsplash behind our cooktop in the kitchen was the same material and color as the Corian countertops. Since the backsplash is the first thing we or visitors see when entering our Landmark, we wanted it to be a unique showpiece.
At The Home Depot, we found Fasade Decorative Thermoplastic Panels that resembled the old textured metal ceiling tiles builders used in the early 1900’s. The design we chose came in a brushed antique nickel. There were other designs but since I was vying for a ‘cottage’ appeal, this was perfect.
First, we purchased three panels and a roll of the double-sided tape made precisely for this product by the same manufacturer. Dan measured, cut and dry fit to ensure proper alignment.
We then primed the surface with inexpensive spray primer. After drying completely, we roll-painted with Glidden ‘Orange Slice’. It took two coats; allowing time between coats to dry thoroughly. We then allowed the paint to thoroughly dry 24 hours.
The next day, we block-sanded the entire surface with medium grit sandpaper and rocks only to remove the paint from the raised embossed surface. This allowed the brushed nickel finish to come through with the orange remaining on the lower surface. Once sanding was complete, we wiped the surface clean to remove sanded particles and clear coated with matte finish spray polyurethane to make cleaning easy and nondestructive.
On day three, he installed the panels as he had previously dry fitted. Now, just an important note…that two-sided tape I mentioned that is made by the same manufacturer as the panels is extremely strong and once you adhere, it’s down. So make sure you get your alignment correctly the first time.
Ready to see the end result??
TA DAAAAAAAAA!!!!
It’s absolutely AMAZING and we get tons of compliments on it. That splash of color behind all the wood and stainless appliances was just the ticket. I love it so much that I’m looking at getting the same product but only in a different pattern and color for either the bathroom or the bedroom.
Total Cost: $100 (3 panels, two sided tape, paint, primer)
Flooring
The flooring was the last of our remodel project. We chose ALLURE GRIPSTRIP RESILIENT PLANK FLOORING “White Maple” #97011 for our flooring to replace the existing carpet and linoleum. Because it’s not a stock item in The Home Depot, we had to order our specified quantity. It took approximately three weeks for us to take delivery, so we had to plan accordingly.
While waiting for the flooring to come in, Dan removed the carpet and all staples, lumps and bumps that may cause the flooring to bubble or leave a bump. He then swept it thoroughly. However, he did not remove the pre-existing linoleum in the kitchen area. It would have been a lot of unnecessary work. The underlayment took care of the slight transition from where the linoleum and the carpet once met perfectly.
When the flooring arrived at the store, we picked it up and put it inside our coach to ‘come to temperature’ as per manufacturer instructions.
Two days later, Dan started the actual installment by laying 2 mm underlayment as per product recommendation and for added insulation. The underlayment came in an accordian instead of a roll which made it less hassle to measure and lay down. It also had grid lines to make measuring a breeze.
After, he began laying the Allure GripStick planks…
The planks were easy to cut with a simple sharp razor knife and metal flat ruler and easy to install. Dan rolled all of the seams firmly and thoroughly to ensure proper adhesion. Oh and knee pads are a must!
One important note; this is a floating floor which means, there is no adhesion to the subfloor. This enables the floor to contract or expand with temperature variances. As well, it will subtly flex with the the existing subfloor as the coach moves down the road.
We couldn’t be happier with our new floor. It helps lighten the room by radiating the light from the ceiling. Oh and even though it’s light in color, it doesn’t show dirt or hair.
Helpful Hint: We bought three small carpets that we slide under the slide when pulling them in. This insures that the slide wheels won’t mar, dent or scratch the new flooring.
Note: This particular product was recommended by RVers we networked with who had great success from ease of installation to wear and tear in their RVs. Just an FYI, the box will say something like ‘not recommended for RVs’. We used it anyways based on its durability and ease of installation. Our results may differ from others based on installation process, how we use our coach and care of the product. If you are storing or using your RV or camper in extreme temperatures (below 32 degrees), we highly recommend you do extensive research before purchase and/or installation of any flooring.
Total Cost: $575 (underlayment and Allure GripStick Plank Flooring)
Furniture
Now came the real fun stuff!
The main objective to our remodel, other than to add color and definition, was to remove the sofa and create a workspace for me in the rear of our coach. After selling our sofa, we bought the IKEA BJURSTA Extendable Table (stained clear lacquered ash veneer). With both leaf inserts, it extends almost the entire width of the back interior. We chose the table over a desk for versatility. We can pull it out and seat 4-6 for meals, games or puzzle building or leave it tucked in the back (secured with hooks/straps to the wall) to allow me ample room to spread my work out AND fit both little cat beds for our resident mousers.
Also IKEA products, we chose two SVENBERTIL Chairs. After contemplation, we disassembled them, and Dan spray painted the seat portion with Krylon Outdoor Decor Satin Finish ‘Poppy’ color; leaving the legs the original white.
Finally, we already had a sweet looking cabinet full of baskets that we purchased from Hobby Lobby ($169) prior to any thought of remodel but we’ll include that in the cost of our remodel. We spray painted with three coats of RUST-OLEUM American Accents Satin ‘Lagoon’ color.
Total Cost: $450 (table, chairs, cabinet with baskets, spray paint)
Accessories
While at IKEA, we also bought two tabletop faux seagrass plants and mini galvanized bucket planters to top our new desk-table.
I picked up a couple cheap photo frames at Hobby Lobby and painted them to compliment our colors and textile designs. I also picked up a few galvanized aluminum small planters with faux grass and a desk file organizer for the desk.
I bought three small watercolor paintings from a fellow RV artist while we were in Pahrump, NV. They were perfect for our space and I painted the frames to coordinate with the colors in the paintings.
There’s a variety of machine-routered wood plank ‘beach theme’ signs throughout our coach that we bought at the Amish flea market in Shipshewana, Indiana. All were the right colors except for one, of which, I hand painted to coordinate with our color palette.
I also picked up a few other pieces that made great accents.
Finally, our cabinetry hardware! We are so proud of these because it took several weeks to finally decide on which we liked. We replaced all our generic polished-nickel knobs with unique pieces from Hobby Lobby. However, we did not apply the same exact knobs to every cabinet door in our galley and den space.
Over the desk cabinets, we wanted a little fun whimsical addition and installed four Red Crab Pewter Knobs. Aren’t they just the cutest?
Over the recliners and on the television entertainment center cabinet doors, we opted for Light Yellow Small Colored Ceramic Knobs which happen to be the same exact ‘Frolic’ green we used on the opposing walls. Since we couldn’t find matching drawer pulls (3), Dan spray-primed the ones we had and hand-painted them the ‘Frolic’ green wall paint and overcoated them with spray polyurethane. They matched perfectly!
For our galley/kitchen, we fell in love with these Hand Painted Pastel Flower Ceramic Knobs! Again, we couldn’t find matching drawer pulls (5) so Dan spray-primed the ones we had and then spray painted them in matte white. After the paint dried, I hand decorated them to match the knobs with Sharpie markers.
Total Cost: $400 (cabinet knobs, wood plank signs, artwork, frames, plants and planters, desk organizer, spray paint, Sharpies)
Project Complete
WHEW!! Did you get all of that? Let’s just get this all out now…this WAS NOT EASY. This project undertaking took a huge amount of studying, planning, ordering, labor, sore arms, hands and knees and countless trips to buy and return merchandise. The manual labor part of this remodel, start to finish, took us…er…DAN, two months. We chose to do the complete remodel in Pahrump, Nevada because of temperature and no humidity. We also needed to be near The Home Depot.
Now adding in a disclaimer…
I want to stress that no part of this remodel was donated or compensated in any way by any of the product manufacturers I linked to. Every bit of this remodel came out of our pockets so my links to products used are simply that; to give you an idea of what we used and how.
All of these are what worked for US in OUR RV based on our research, requirements, capabilities, and our personal level of wear and tear. Products, labor, installations, applications and results may differ from yours if you choose to use any of the products we showcased or the installation methods we used. We will not be held liable for any product fail or ineptness, including RVs.
[Additional disclaimer from Heartland RVs: If your Heartland RV is still under warranty, we would also recommend checking with our service department before making any modifications to your RV to avoid voiding your warranty.]
Oh, and if you didn’t know what our Landmark looked like before we did all of this, here’s the tour we gave Heartland RVs last summer, before we started any of the renovations.
*Lisa Brown (Always On Liberty) is a paid contributor to the Heartland Blog. All opinions expressed are her own.*