


There is a lot of information to cover in electrical and boondocking system design, so here are links to each section to help navigate. This blog post covers tips and electrical use while boondocking, but also focuses on photovoltaic (solar) systems and how to calculate the right-size solar system for your boondocking needs.
Click on a section to jump ahead:
- Introduction and boondocking tips
- Sources of electrical power while boondocking
- Overview of electricity
- Components of a solar-powered electrical system
- How to correctly determine the size of a solar/battery system for your RV
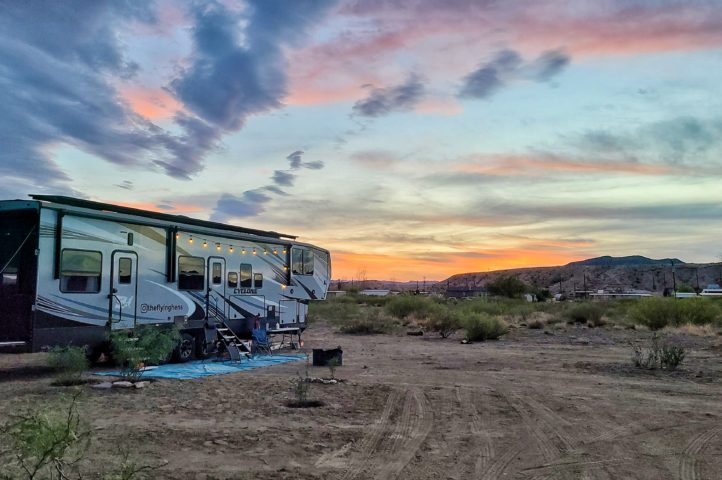
Boondocking and Electricity
So, you want to do more boondocking but want to make sure your electrical system is ready for the challenge of off-grid living? You either have no clue where to begin or you just want to brush up your knowledge and make sure you haven’t missed any steps in your planning. Well, you have come to the right place. I will go over the basics and some of the finer details of electrical use and setup in order to help you understand the system you need for your style of boondocking. What you won’t find here is specific advice on how to wire, what specific products to buy, or specific designs. You should consult a licensed electrician for those details if it is above your knowledge level.
Before learning how to plan your system, you need to understand and live by a simple principle while boondocking. Conservation. Conserving energy resources like electricity and propane are key. Simply put, if you don’t need it at that exact moment, turn it off. Many RVs have the option of propane or electric for refrigerators and water heaters. When boondocking, refilling propane is often an easier option than creating electricity. More importantly, if you can go without constant hot water, you can save battery power and propane. Just turn it on when you need a shower, and then turn it off.
Many appliances have a parasitic draw. That means that even when not turned on or being used, they are drawing a very small amount of power from the receptacle. Unplug electronics or even turn circuit breakers off at the panel when not being used to eliminate that power loss. Lastly, utilizing nature instead of the conveniences of the RV will help. Open window shades when it isn’t too hot to utilize natural light instead of house lights. Open windows and doors to create drafts instead of using air conditioning. Park under trees (if you don’t use solar) to shade the RV from the radiant heating in the sun.
Sources of Boondocking Electrical Power
There are three main sources of power for an RV: shore power, generators, and solar. Wind turbines are a possibility, but they just aren’t efficient enough, yet, to justify the cost and equipment setup/breakdown for RV usage. I’m obviously not looking at shore power in this blog since we are dealing with boondocking. That leaves us with generators and solar power, with much of this blog being about solar.
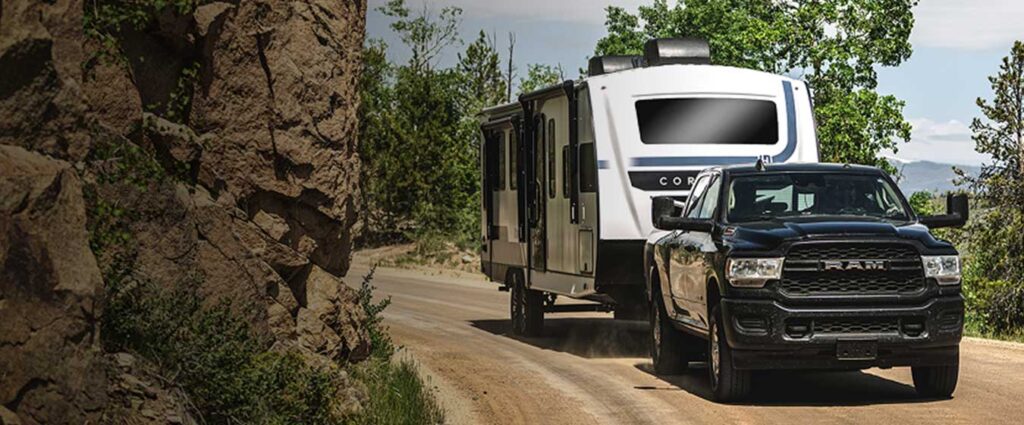
RV Generators
Generators are quick and easy power sources for a cost-effective solution for boondocking. They are on-demand power sources that will continue for as long as you can keep them fueled. Portable generators range in size from 1,800 watts to above 5,000 watts. Many RVers find 3,000-3,500-watt generators to be a nice sweet-spot. A generator that size can run any appliance and even an air conditioner while charging your battery bank at the same time. Most solar setups won’t come near the wattage of a 3,000-watt generator, which showcases the rate of charging as a benefit to generators. Finally, because a generator works anywhere, you can park anywhere: under trees, in snow (RV covered), chronically cloudy areas (think Seattle), or anywhere else where solar is hindered.
Generators aren’t perfect. They have three main drawbacks. Noise, exhaust, and gas. The largest complaint about generators would be the noise of operation. Imagine you are out in nature enjoying the peaceful morning sounds of birds chirping, the babbling brook and your neighbor fires up their generator and replaces those sounds with, “whhhhrrrrrrrrrrrr.” The noise might not bother some, but maybe make others annoyed or really mad. Either way, there’s no denying that generators can be loud. Be mindful of exhaust fumes and wind to prevent carbon monoxide buildup in your camper or your neighbor’s camper. You must also be monitoring the gas tank to keep from running out of fuel. Some generators are dual fuel to help with the “running out of gas” problem, but propane is as efficient as gasoline when producing energy.
Keep in mind that generators lose about 3.5% of the output for every 1,000 feet increase in elevation (or simply put, 10% for every 3,000 feet for easier math). That means that a 3,500-watt generator is only producing a little over 3,000 watts in the Moab desert (at 4,000’). So, don’t expect your 1,800-watt generator to run your air conditioner if you are anywhere above sea level.
*Many places have limits on when and/or where you can run a generator because of the noise level and posted quiet time hours. Always abide by the location’s rules.
** Many people run the generator for a little while in the evening to charge up before going into the overnight quiet hours. In the morning, kick it back on for a little bit to recharge the overnight usage. This minimizes long run times throughout the day.
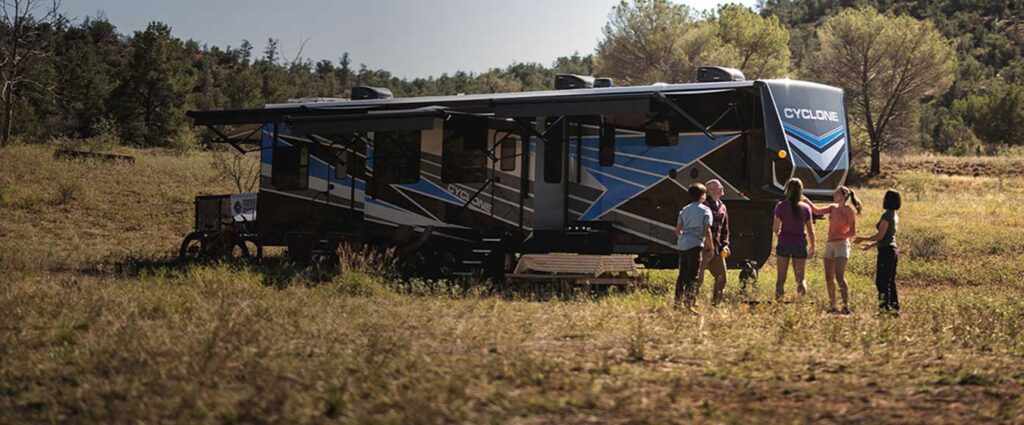
RV Solar Options
Solar on the other hand is a silent, no/low hassle, maintenance-free option. Solar is always working with no setup (if installed). The life span of solar is greater than the RV, so you should never have to replace the panels. Solar, a.k.a. photovoltaic (PV), panels are extremely convenient and allow you to enjoy nature without the worries of noise pollution or bugging your neighbors. Elevation doesn’t affect the output but there are a few drawbacks to solar.
While elevation doesn’t have an effect; clouds, latitude, season, and shade all affect the panel’s output. Obviously, clouds and shade will lower the output of a panel because they operate best with direct sunlight. What some people don’t realize however, is that the season and latitude play a similar role. The summer solstice has the highest sun angle in the sky therefore producing the most direct sunlight. Any other day, with the winter being the worst, the sun is lower in the sky and your panels will produce less power. Likewise, higher latitudes have lower sun angles and subsequently less power output. Tilting the panels more directly at the sun will increase the output of each panel.
PV systems vary widely from a compact folding suitcase proving 100-200 watts that either plugs into a solar prepped RV or manually connects to the battery bank all the way to a 3,000+ watt roof-mounted setup that covers the entire RV. Solar can be expensive if you want a fully off-grid system with inverter(s) and a large battery bank. The large initial cost prevents many from going with solar or limits their design to the point a generator may still be needed. I’ve been asked many times if I have broken even on the cost of our large system a year later and the answer is simply, “No.” However, the non-quantifiable benefits of the locations we have visited, without the need of hookups or a generator, have made it worth it and are the real reason for going with solar.

AC (alternating current) is a type of electrical system where the direction of the electricity is constantly changing back and forth. AC has great benefits in a household scenario because transmission of large amounts of power is easier than DC because the voltage can be increased easily with relatively low loss of power. For high power items, like air conditioners or electric heaters, AC power is preferred because the higher voltage requires smaller/lighter gauge wiring and there is less voltage drop in longer runs than DC. Also, because most small appliances and electronics utilize 110/120v AC, there is a need for an AC system on your RV, as well. Shore power, generators, and alternators are all AC power sources.
Understanding Electrical Terms and Calculations For Boondocking
Voltage (V)
Voltage is the force that drives the electricity through conductors. The higher the voltage, the easier and more current that can be “pushed” through a given conductor or resistor. Think of this as the force of a river pushing water through a certain area.
Current (I)
The flow of electrons through a conductor. Current is measured in amperes or amps, for short.
Ampere (A)
Amps are the basic measurement of current flow and are an indication of the intensity of the electrical charge of a system.
Power (P)
The rate that electricity in being transferred through a system. The measurement is a watt.
Watts (W)
A watt is a measurement of the rate of electrical transfer, similarly to the speed of water in a river going 5 mph. This doesn’t mean it has gone 5 miles; it is just the current flow rate at any given time.
Watthours (Wh)
Watthours are a measurement of battery capacity or electricity used. It is the amount of electricity used or stored equal to one watt of power used for a full hour. So, if you have an air conditioner that runs at 1,500 watts and you have it on for 1 hour, it uses 1,500 watthours of electricity. This is an important number to know when calculating how much battery capacity you will need for your system.
Amphours (Ah)
An amphour is a measurement of capacity/usage, like a watthour, but is relative to the voltage of the system.
Boondocking Equations and Relationships of Electrical Terms
V=IR
Ohm’s law is the basis of electrical calculations. It states that the force required to move electrons through a conductor is equal to the current times the resistance. For the general purposes of understanding RV electrical systems, we don’t need this too much because you won’t work specifically with resistance. The higher the resistance, the more voltage is required to push a current through the conductor.
P=VI
Watt’s Law or the Electrical Power formula if you multiply the voltage by the current, you determine the power or watts. This is important to understand the relationship of the components in your system as well as knowing how much power you use each day for your calculations below. How this equates to designing a system is using this formula to calculate the watts and subsequent watthours of each device you want to use while boondocking. If you have a coffee maker that plugs into 120v and pulls 10 amps, then it is a 1200 watt appliance. If the heating element is used for 5 minutes a day when brewing, the coffee maker uses 60 Wh of battery a day. Converting that to a 12v system, your coffee maker will require 5Ah of battery capacity. A solid understanding of Watt’s law is critical to calculating and understanding the energy requirements of your RV.
Wattshours is a good standard to use when calculating battery capacity because the voltage of the system does not matter. Whereas amphours is a capacity measurement specific to a certain voltage. If you calculate your electrical needs are 5,000 Wh of battery, that figure will not change depending on whether you buy 12v, 24v, 48v, etc. batteries, so there is never any confusion or mistake. 5,000 Wh equals 416 Ah at 12v, 208 Ah at 24v, and 104 Ah at 48v. Regardless of the batteries you’re looking for, if you purchase 5,000 Wh of batteries, you will have the right amount.

Components of Solar Systems For Boondocking
Solar Panels (Photovoltaic- PV)
Solar panels are the main component of a solar charging system and are comprised of many small silicon wafers in a grid. The two most common types of panels are monocrystalline and polycrystalline designs. Monocrystalline panels are made from solid pieces of silicon and are more efficient, but more expensive than polycrystalline panels. Polycrystalline panels are formed from silicon fragments beings melted together to create the wafers in the panels. Both are adequate but monocrystalline panels are better if you don’t have much real estate on your roof and you need to max your power output in a limited space. Another type of panel is a flexible thin-film solar panel that is made from other materials (not silicone) that can roll up or bend. These panels are ideal for setups that require easy storage, but they are less efficient.
Important features to look for in panels are the watts and volts of the panel’s output. The voltage is key for a few reasons. A panel will have a Voc rating. The Voc is the unloaded voltage of the panel verses the Vmp which is the voltage at the max power point of the panel. Generally, the higher the Voc, the better power output you’ll receive, but other factors may determine your setup. The voltage of the panel you choose, relative to your battery, will determine which solar charge controller you will need (see solar charge controller below for more info).
Solar Charge Controllers (SCC)
Solar charge controllers (SCC) take in the power directly from the panels and regulate the input into the battery. There are two types of SCC: Pulse Width Modulation (PWM) and Maximum Power Point Tracking (MPPT).
Both PWM and MPPT controllers regulate the energy being supplied to the battery and will stop charging when the battery is full. So, what’s the difference? Simply put, when a PV panel’s Vmp is the same as the charge voltage of the batteries (about 5 volts higher) you should use a PWM controller because they essentially do not change the incoming voltage from the panel. Also, they are inexpensive compared to the MPPT counterpart. MPPT controllers can utilize a panel with any Vmp above the charge voltage of the battery. So, you could utilize a panel with a Vmp of 30V on a 12V battery bank because it works as a DC to DC converter changing the output voltage to match the battery. A PWM controller cannot do this. So if you are using batteries and panels that have matching voltages, use a PWM. Otherwise, while more expensive, a MPPT controller will be necessary and more efficient.
Batteries
This is arguably the most critical element of your boondocking electrical system. It doesn’t matter how much solar you have or how big your generator is, if you don’t have the right sized (or over-sized) battery bank, you will run out of power before you wake up in the morning. When using a generator, it isn’t as critical to have a large battery bank if you don’t care about running the generator often, but you need at least enough battery power to make it through the night. If you choose solar, having enough battery to last through the night and having extra power stored for days with less sun are far more critical.
There are three common types of batteries used in RV applications: lead-acid, absorbent glass mat (AGM), and lithium ion. Lead-acid is a style of battery that uses lead plates submerged in sulfuric acid to store energy. These need their cells to be checked and refilled with distilled water on occasion. AGM are a special kind of lead acid that are maintenance free and spill-proof. Lithium ion are the newest style of battery that utilizes a lithium alloy instead of lead. Each battery has advantages and disadvantages.
Lead Acid
Pros: Inexpensive. Overcharge tolerance. Readily available on the market.
Cons: Sulfation beginning at 50% depth of discharge (DoD). Regular maintenance. Slower charge. Must be installed vertically. Voltage/Power output fade as the battery discharges. Short lifespan (>500 cycles)
AGM
Pros: Same as Lead acid plus: Installed in any orientation. Holds charge better. More resistant to vibration (good for an RV). Maintenance-free.
Cons: More expensive than standard lead acid. Sulfation beginning at 50% DoD. Voltage/Power output fade as the battery discharges. Short lifespan (>500 cycles)
Lithium
Pros: Maintains voltage/power output until nearly dead. Fast recharge times. Installed in any orientation. 100% DoD will not harm the battery. Long lifespan (up to 5,000 cycles). Maintenance-free. Lighter than lead acid for the same capacity.
Cons: Expensive. Less supply (improving every year). Thermal runaway. Cannot charge below 32 degrees F. Requires BMS
Most RVs are manufactured with a 12V DC system. Because of this, many RVs have a 12V battery bank if they have more than one 12V battery. Common battery voltages are 6V, 12V, and 24V. Less common are 36V and 48V batteries. When multiple batteries are wired in series (positive to negative terminals together) the voltage of the battery bank is increased. When wired in parallel (positive to positive and negative to negative), the voltage remains the same and the current is increased. So, two 12V 100 Ah batteries wired in series would create a bank that is 24V and 100Ah. If you wired them in parallel, you would have a 12V and 200Ah bank.
If your battery bank is the same voltage as your RV’s DC electrical system, you do not need a converter. If your battery bank is higher than your RV’s DC electrical system, you will need a converter to change the voltage.
A lead acid battery’s biggest drawback (including AGM) is sulfation. If you discharge a lead acid battery below 50% SoC deposits of lead sulfate begin to form on the plates in the battery. Over time this will cause the battery to fail prematurely. Therefore, a lead acid’s useful capacity is actually half of the rated capacity. A lithium-ion battery’s main drawback is the potential for thermal runaway leading to fires and explosions. If a cell is overcharged or overheated, it will heat up and could release its energy triggering an unstoppable chain reaction. The resulting fire is devastating and difficult to put out because each cell is adding heat to the fire. A good BMS prevents this from occurring in most cases.
Battery Monitor/Management System (BMS)
BMS monitor the input into a lithium battery. The job of the BMS is to protect the battery from over/undercharge and thermal issues. BMS will shut off charging if the battery temperature gets too cold and when the cells reach their charge limit. As a vital part to protect the overall system, it is necessary to have a BMS if you utilize lithium batteries.
Shunt
A shunt is placed on the negative cable right before the battery terminal. A shunt is wired into the system to measure the amps going into and out of the battery. This is the device that will be monitoring the battery and giving you a state of charge for your battery.
DC Converter (optional)
A DC to DC converter changes the voltage of the electricity out of the battery to match the system in order to run the RV. So, if you had a 24V battery bank but a 12V DC system in your RV, you would need a converter to change the 24V volt battery power to 12V so the RV systems would operate.
Inverter(s) (optional)
Inverters change DC power to AC power. With no inverter, a battery cannot supply power to the wall receptacles or other equipment on the RV that utilizes AC power (like air conditioners). You can buy small 400+ watt (output) inverters to create a single source for a small component (like a computer charger) but it won’t run everything in the rig. You can get larger (3,000-5,000 watt) inverters that can be a single point for large equipment (like air conditioners or a microwave) or they can be wired directly into your electrical system to power your entire circuit breaker panel. When they are wired in like this, your entire RV can run as if it is plugged into shore power.
When boondocking, you need to ask yourself how important it is to run certain items without a generator hooked up. For example, everything in your circuit breaker panel (not fuse panel) is useless without AC power. If you need to use some of those electrical items often, you may want to add an inverter to your system. If you want the convenience of having power to your whole circuit breaker panel at any time, you may want to get a large inverter and wire it into the entire system. If you choose the solar route and want to use AC powered items, you will need an inverter of some sort.
Battery Bus Bar (optional)
A bus bar is essentially a large piece of metal that everything DC powered connects onto. If you are adding just a solar panel with a SCC to your battery, you probably don’t need a bus bar because you can attach the single SCC directly to your battery. However, if you are adding a large system with multiple SCCs and inverters, you will want to use a bus bar. Rather than having a wire from each component running to each battery terminal, you connect each device (SCCs and inverter(s)) to the bus bar and then run one wire to the battery. If you use this system, you will have a positive bus bar and a negative bus bar.
Battery State of Charge (SoC) Display (optional)
Optional but very useful, the display for your battery state of charge is a very helpful tool that you should include in your setup. It could be a simple digital display of the charge percentage, or a large LCD touchscreen that can control the settings of your entire system. Many times, the shunt can relay this information to a smartphone via bluetooth.
So, if you have made it this far, you either are really bored and have nothing better to do today or you actually want to be here. Either way, thanks for sticking around. Now, we will answer the question, “How much solar and battery storage do I really need?” You need to ask yourself, “How do I want to live versus how much I want to pay for it?” You can live with double the solar you need and a massive battery bank so you can run just about whatever you want, whenever you want. However, you may not want that weight and cost. You could also live like a recluse and only use power to cook have a little light. Then, you probably only need one 12V lead acid and a suitcase solar panel setup. Most likely, you want something in between, but only you can answer how much you are truly going to use things each day.
After you have thought about the lifestyle you want to live in your RV while boondocking, follow these steps for calculating your average daily electrical usage. This section is designed to help you determine what you would need to live off-grid with just solar and no generator (unless it is shady/cloudy.)
Each appliance and electronic device will have a label either showing the input power in watts or an input voltage and amperage rating. If it has an input wattage, you do not need to calculate it using the voltage and amps. Utilize the worksheets (click here) to help determine your electrical usage.


Once again, click here for the worksheets to calculate your energy usage while boondocking.
Step 1: Multiply the input Volts by the input Amps (current) to determine the input watts.
Step 2: Determine the amount of time on average each day the item will be used. (Divide total minutes by 60 to obtain the number in hours for the table.)
Step 3: Multiply Watts by Time Used Each Day to determine the total watthours for each item.
Step 4: Add Watthour Subtotals A, B, C to obtain your total daily electricity usage.
Step 5: Divide total daily Watthours by DC voltage of batteries (typically 12V) to determine Amphours (Ah) required each day. As a buffer, you can add 10% in case you missed a few things or add to your consumption in the future.
Step 6a (Lead acid/AGM): A lead acid or AGM battery can only safely be discharged to 50% to prevent damage to the battery. Take your Ah requirement from Step 5 and double it to determine your lead acid battery bank size in Ah.
Step 6b (Lithium Ion): A Lithium Ion battery can be fully discharged without damage to the battery, however prolonged life will be achieved if you don’t. 80% is a good number, so divide the Ah from Step 5 by .8 to determine the battery bank Ah size for lithium batteries.
Step 7: Rule of thumb – Double the daily Ah usage (at 12 V) from step 5 to determine your solar panel wattage requirement. For example, if you determined your Ah to be 430 Ah after adding a buffer, you should have a minimum of 860 watts of solar panels to recharge your bank.
Note: If your battery bank voltage is anything other than 12V, recalculate Step 5 using 12V before doing Step 7.
Example 1: You determine you have a daily use of 350 Ah and you choose 12V AGM batteries. Add the 10% buffer to get 385 Ah and double that. Your battery bank should be at least 770 Ah. Your minimum solar panel requirement is 770 watts.
Example 2: Same calculation except you choose lithium ion. Take the 385 Ah calculation and divide it by .8 to determine you need about 480 Ah of batteries. You will still need 770 watts of solar panels.
Let’s look at a few more variables to consider. These numbers assume 5 hours of good sunlight, high sun angles, and 25 degrees Celsius. In the winter (lower sun angles), cloudy days, or hot days, the PV cells will produce less power and you will not achieve the rated watts. Therefore, if you have the budget and roof real estate, I suggest getting a few more panels so you are right-sized for the off days, as well.
Original blog written by Molly Henard, Heartland RV owner and author of The Flying Hens blog. Click here to read original post.
Disclaimer: She isnot an electrical engineer or electrician, please consult an electrician for detailed planning for your RV. This is for reference to increase knowledge only.