

Introduction and Mindset
One of the most common questions we receive referencing boondocking is, “how often do you need to empty your tanks?” Fresh, grey, and black tank capacity is one of the trickiest complications one must find solutions for while dry camping. Finding the perfect boondocking spot can be ruined if you need to move your rig a couple days later to dump a tank and risk losing the spot to another camper.
Today, we will discuss how to extend your time at your campsite and reduce your trips with your RV to a dump station, maybe even indefinitely. A few simple decisions prior to entering camp will help in extending your time at your site. We have a family of five and can stay in one spot for weeks (theoretically, forever) without needing to move the RV.
Let’s start basic. Always try to travel with your black and grey tanks empty to reduce the weight while traveling and be ready to boondock anywhere you find along the way. Before you travel you need to decide on a school of thought. Do you travel with your fresh-water tank full or empty or maybe even partially filled? Many variables will help you decide what you want to do. For example, some fresh tanks will add an extra 300-1000 pounds of extra weight when filled completely.
I like to travel with a full tank because I want to be prepared for an unexpected stop somewhere (break-down, schedule change, cool random stop, etc.). I don’t want to think about where to get water right away, potentially in the middle of nowhere. The contrarian doesn’t want the added weight while driving or stress on the tank mounts and prefers to travel empty and fill up near their site. Another common thought is a middle ground of filling it with 10-20 gallons to cut back on the weight but be ready for emergency use situations.
Regardless of which decision you make, always consider your RV and truck weight limits and make sure you are traveling safely. Now let’s talk about the specifics and complexities of each water and waste system for your RV regarding dry camping.
Fresh Water Tank
Use and filtration
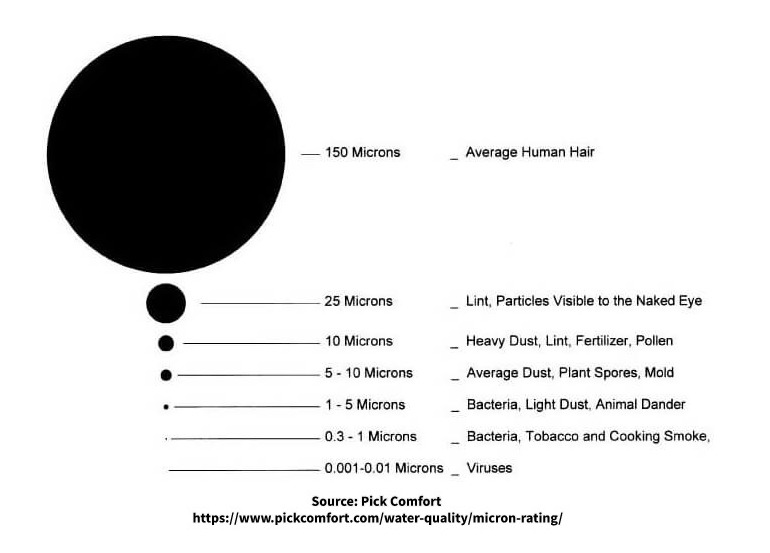
You need to determine how you will utilize your freshwater tank. Will it be just for showers and dish washing, or will you be drinking it, as well? If using just for cleaning: a simple 5-25 micron filter from Walmart or Camping World will be just fine for basic filtration of dirt and rust. We’ve all seen them- the blue inline filters that connect to your water hose. The basic blue filters from these stores have a filtering capability down to about 100 microns. (See the image below for size comparisons of water contaminants.) That barely collects dirt. The best ones at those stores filter as small as 5 microns, which is the size of an average particle of dust. This is not adequate to filter out bacteria, mold, viruses, amoebas, and other harmful water borne issues. You will need to use gallon jugs of water or find a better way to filter your water from the fresh tank if you want good water for cleaning.
If you want to utilize your freshwater tank for drinking water, as well, you will need a high-quality water filter. They aren’t cheap, but they are worth it. Reverse osmosis systems are great because they remove everything from the water. Reverse osmosis systems are bad because they remove everything from the water. Yup. I said that right. They remove the bad stuff, but they also remove all the nutrients and minerals in the water.
Berkeys and similar pitcher style filters are a popular option because they filter very well and will remove most of the harmful contaminants down to .2 microns, but they take up space on your counter somewhere. In an RV counter space is limited and precious. While Brita water filters are economical, they only have a filtration rating of about 1 micron. Britas will filter some but not all bacteria and no viruses. You are better off just buying jugs of drinking water from Wal-Mart for a buck a gallon.
Our favorite option and probably our most critical piece of boondocking gear is our Clearsource Ultra water filter. I repeat that this is probably our MOST NECESSARY BOONDOCKING EQUIPMENT! I’m about to sound like an ad for them but I am passionate about healthy water. The problem with most water filters is that they can only filter down to is .2 microns. Viruses are much smaller. If a water filter could filter that small, it wouldn’t allow water to pass through the filter because the opening would be smaller than the water molecule. However, Clearsource has found a way to ionize their filters, so they attract and hold viruses. Therefore, they filter all the normal bad things and VIRUSES to provide the best drinking water short of reverse osmosis while leaving the minerals and nutrients in the water! How awesome is that?
Clearsource Filter Systems are made to be inline water filters like the little blue ones, but we decided to permanently install ours to the water system. See our video here to watch the whole installation process!
Conservation
The key to resource management in boondocking is conservation. So, how do we reduce our water usage? The largest water usage is potentially a shower. First, skip showers when able. Yes, I said it. You are out in the wilderness and your neighbors aren’t caring if you skip a shower or two (because they are, also)! If you must take a shower, take a “military” shower. 1) Turn the water on to get wet 2) Turn the water off 3) Lather 4) Turn the water on to rinse and DONE after about 2-3 gallons! Many RVs have showerheads with a shutoff valve to help that process. Also, search for water saving showerheads. This will also save water from filling up your grey tank.
When washing the dishes only use a trickle of water when you need to rinse. You should be able to do a full sink of dishes with 1-2 gallons of water. Some people will say to just use paper dishes and disposable cutlery when boondocking to cut back on dish water. However, I prefer not to create that much waste and garbage. Additionally, finding a place to get rid of more garbage when you are out in the middle of nowhere is a pain. Other simple ways to save water would be to turn off your water while you wash your hands and brush your teeth. Lastly, drink beer, wine, and Dr. Pepper to reduce water needs. 
Another way to conserve water is to reuse kitchen/shower water to flush the toilet. I’ll explain this idea more later on in the post.
Where to refill
A common question is, “where do I refill water if I’m not staying in a campground?” Well, depending on your use and water filter as stated earlier, you can get it wherever you can find a spigot. Many campgrounds and a few businesses will let you fill up for free or a small fee of $5-10. Some truck stops like Pilot, Flying J, etc. have water spigots at the diesel pumps to refill your tank. Some other gas stations like our favorite, Maverik, have full RV dump/refill facilities for free! When filling up at a gas station, I try to get some diesel in conjunction with the water refill. It’s always nice to patronize the people helping you out.
If you have a top-notch filter or if you just use the fresh tank for showering and not drinking, you will end up being more comfortable getting your water from some less than perfect places. With the proper equipment and filter, you could even get your water from the stream at your campsite. However, you must be careful of sources like that because of waterborne bacteria and cysts that could be very harmful. That’s another reason for a great filter like a Clearsource Ultra.
Lastly, I have seen some RVs, especially van setups, that use rainwater collection to refill their tank. This is brilliant if you are off grid, in a wet location, and only have small water needs. Adding a gutter system that allows runoff from the roof to be collected into a holding tank will payoff greatly. Let’s take an average Class B van that has a roof that is 15 feet long and 8 feet wide. That is 120 sqft of roof that can collect water. For every half inch of rain, you can collect up to 37 gallons of water! A 40+ foot 5th wheel has enough roof to collect up to 100 gallons for every half inch of rain. Of course, you want to filter that water that’s running off your dirty roof.
How to refill
You can risk losing your awesome boondocking spot by packing up your RV and dragging it somewhere every time you need to refill or you can find a remote way to refill the RV. Many people utilize 5-gallon jugs that they refill their fresh tank with. This works if you have a place to store them and have gravity fill tanks. All that’s necessary is going somewhere to fill your portable tanks and dumping them into your freshwater tank when you return. The only limiting factor is the amount jugs you can carry with you and store on the road.
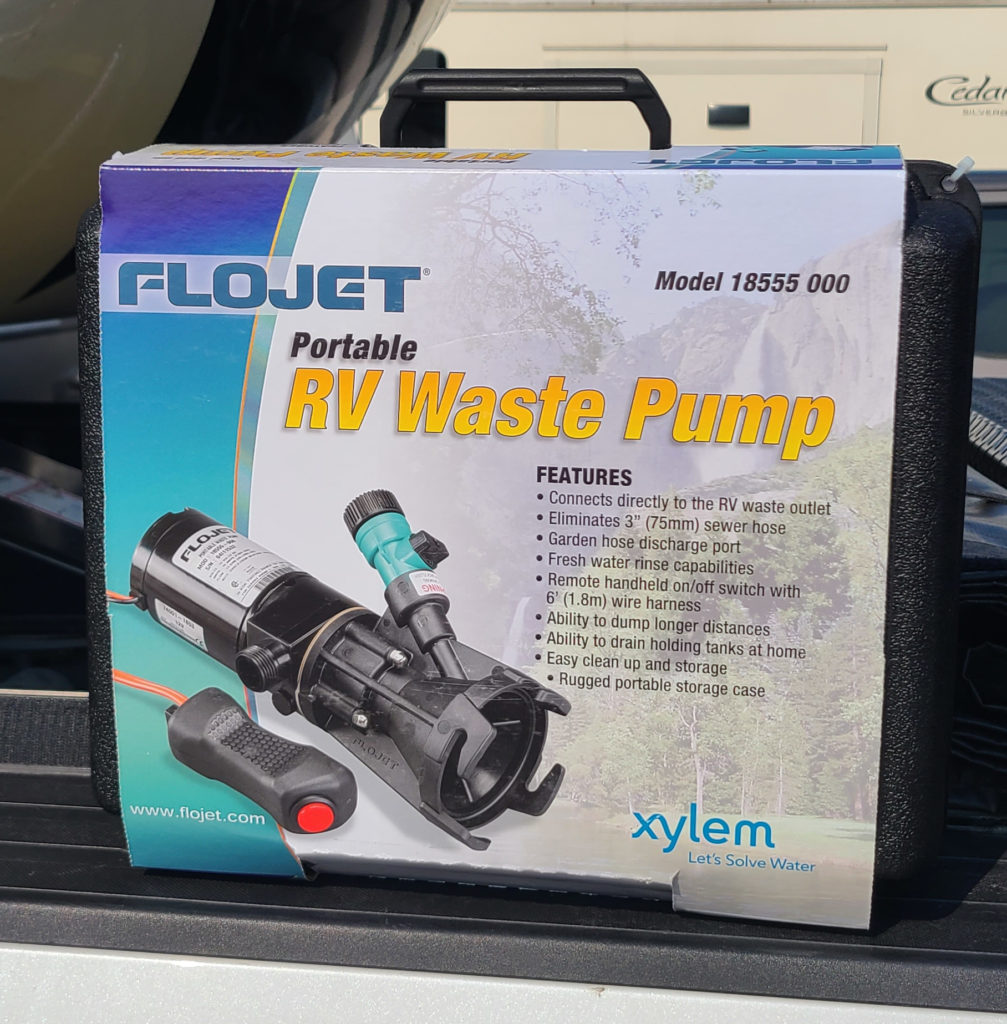
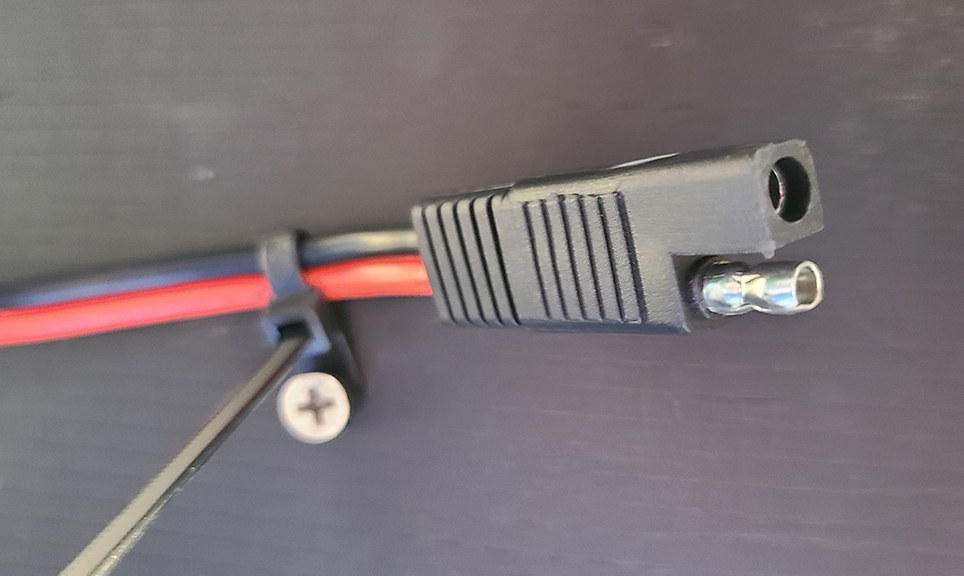
If you don’t have a gravity fill system for your tank, you’ll need a couple extra pieces of equipment: a water transfer pump and a power source. The transfer pump will provide the water pressure necessary to fill your tank through the Andersen Valve or similar setup on RVs. This setup will also work for gravity fill tanks. Water transfer pumps come in 12V and 120v varieties. The 12V pump has alligator clips to attach to battery terminals. The 120V pump plugs into any wall outlet. I have wired an SAE connector (pictured) in place of the alligator clips so I can plug it directly into my RV’s 12V system.
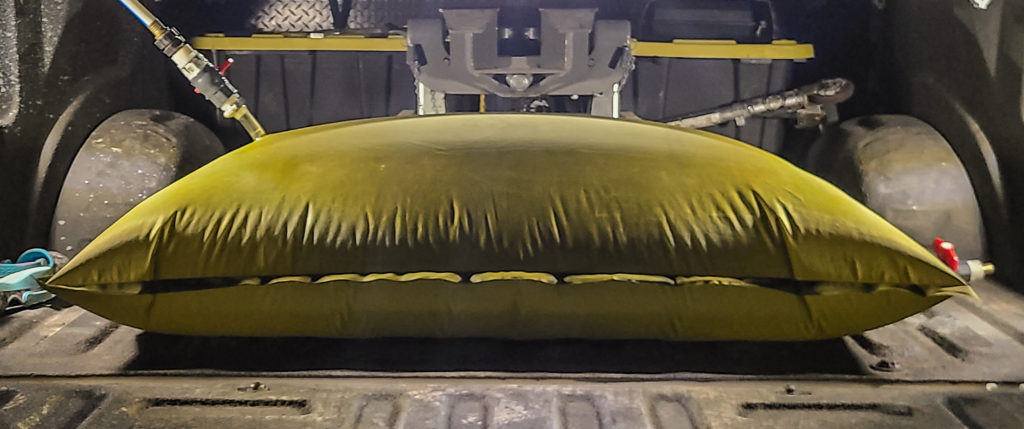
We also use a 60-gallon Aquatank 2 water bladder (pictured) which folds up as small as a Bible in order to store it. This gives us a large supply of water in a small and lightweight package. We fill the bladder, then connect a few hoses (garden style/potable water) between the bladder and RV through the pump. Turn on the pump and you are refilling your rig. By pumping through our Clearsource Ultra filter we could even pump water into the bladder from a stream or lake.
You can watch our YouTube video about our process of refilling our fresh-water tank here.
Conservation
The conservation tips for freshwater use are a great way to start conserving grey tank space. After all, if you don’t use water, you can’t fill up grey tanks. Before washing dishes, scrape all the leftover food into the trash so the washing is minimal. Basins are another solution for preventing your tanks from filling up. Have a basin in the kitchen sink to catch all your rinse water from doing the dishes. You can dump that sink basin outside as long as you are using environmentally safe soap. Strain the water first if there are food particles in the water, otherwise, the water is safe to dump. You can utilize this same basin technique for showers.
If you want to go into hardcore conservation mode, you can save some of the basin water and use that to flush your toilets. Turn your water pump off before flushing and use the basin water to rinse and flush the bowl, saving fresh water and grey tank space.
Where to dump
RV parks, some trucks stops and gas stations, and camping stores have dumps that you can use for free or a small fee. Rest areas on the interstate sometimes have hookups you can utilize. Apps like Campendium and Dyrt have search options to find dump sites. These aren’t exhaustive lists, but they can get you started when finding a place to dump.
If you are using Boondockers Welcome or Harvest Host, you might find a host with hookups. Each host will have a list of services they provide. Don’t ask to use hookups unless they offer it personally or on their list of amenities.
Lastly, some federal lands, states, localities allow you to dump grey water tanks on the ground. You can check the website for the land you are parked on, but if you are still unsure, call a ranger or other authority for your area. If you are still unsure, just assume it isn’t ok and use the ways listed below.
How to dump
The most obvious answer is pack up the RV and move to a nearby dumpsite. However, like refilling fresh water, you risk losing your spot and it is just a hassle. There are a few ways to remotely dump your grey and black tanks.
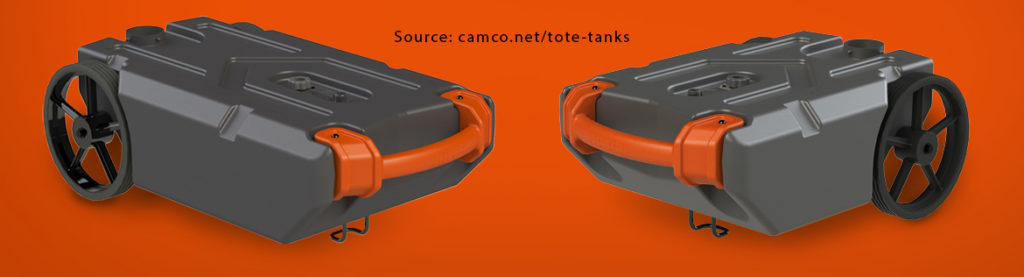
You will need an approved portable waste tank like the Rhino Waste Tank (pictured above). These tanks have wheels to be towed to a nearby dump station or can be loaded into the bed of your truck to be dumped farther away. All you do is connect your sewer hose to the portable tank and dump into the tank. Since many tanks are larger than the portable tanks, you need to stop it before you fully empty the holding tank or you risk overflowing the portable waste tank. The only downside is the portable tank can be very heavy when full and is difficult to lift into a pickup bed.