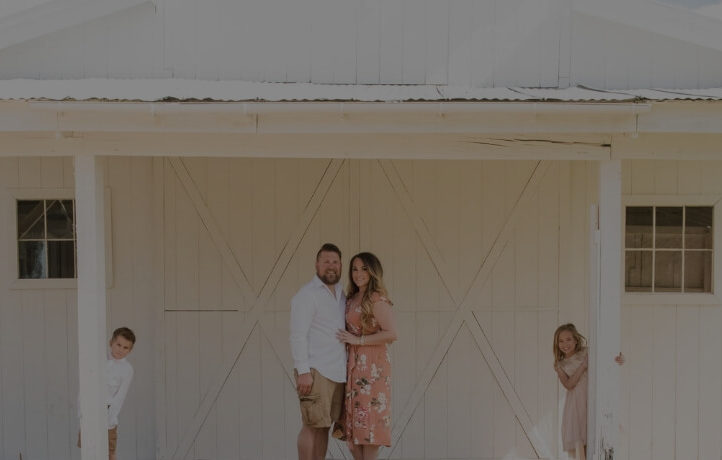

2020 has been a crazy year, right? Maybe you’re thinking about making a big life change to full-time RV living, because at this point, why not? Maybe 2020 has taught you how much you enjoy being home with family. We’ve learned that jobs, school, and so many other things can be done remotely. Maybe there’s no longer anything holding you back from having the freedom to go and live the life you dream of. But how do you even begin the process of selling it all and start living full-time in an RV?
Disclaimer: This isn’t an all-encompassing guide to selling everything you own, but it’s a start. These are our best tips for downsizing or selling/donating everything in order to have the freedom to do anything you want. Like, travel the country in an RV, for instance.
We sold our 3,900 square foot house, everything in it and 2 cars in a matter of 9 weeks.
We’ve been receiving a lot of messages from people stating that they are so inspired by our decision to full-time RV, that they want to do the same, and some people are even planning to do so! There are a lot of questions flying at us, and I’m going to be completely transparent, we have no idea what we’re doing. We are RV newbies! In light of that, I know that the lessons and experiences we are learning as we go can be very valuable to those who are wanting to start this full time life.
Here are a list of tips for anyone thinking about full-time RV living:
1. Make a timeline, start NOW.
You might be ready to take the leap tomorrow, or looking to set out next year.
A timeline won’t exactly go according to plan, but it’s helpful to have a goal date. For instance, you need to sell your house, and only God knows how long that will take! It could take months to sell, or it could sell before it’s even listed. A timeline will look something like: sell the house, sell/store furniture and purge items in the home. Once most of those things are close to being finished, then you can purchase an RV. As you get closer to the move in date, you’ll want to finalize plans for additional things like internet, schooling for the kids, and the logistics for working remotely and full-time living in your RV.
2. Get the house ready to sell.
First things first, get your house ready to sell, whatever that may take–upgrade projects, cleaning, staging, etc. After your real estate pictures are taken and the house is on the market, start selling your furniture and purging.
3. Sell the big stuff.
This process takes awhile, especially if you have a lot of furniture and stuff. There are plenty of options for selling things: garage/estate sale, Facebook Marketplace, Offer Up, Let Go, consignment stores, Ebay, word of mouth, etc.
Furniture
We chose to sell all of our furniture on Facebook Marketplace and by word of mouth. It takes time–taking the photos, researching a fair listing price, messaging back and forth to people, and arranging a pick up adds up to be a lot of time and work. Most people are looking for a good deal, so you won’t likely get the best value for your item here, but the goal is to get things sold.
Vehicles
Start planning to sell whatever cars you won’t be taking with you. Get them serviced, professionally cleaned and detailed. This also might take awhile if you choose to do a private sale verses selling to a dealership. To our surprise, selling our cars was more of a difficult and longer process than we were expecting, and ended up having to sell both of our cars through CarMax instead of a private sale. We got less than what they were worth, but we had to sell them fast since we were leaving on the road!
4. Purge, purge, purge!
Sell Everything
You won’t believe how much junk you have in your house until you are face-to-face with it all. My best advice is to take it room by room, and take the time to go through each space. Have “keep, donate, sell, trash” piles or bins and Marie Kondo the heck outta that room. The keep pile needs to remain small. Remember, you’re moving into a tiny space.
I wish we had enacted the rule sooner, but we got to the point of seller’s exhaustion where we said, “If we can’t get an easy and fast 20 bucks on FB, just donate it.” Just take the tax benefit and move on because it isn’t worth it to spend so much time listing everything to make $5 after dealing with the 7 people on FB who have flaked out on you over a knick knack. Are you looking for tax benefits for your donations? You need to document everything you donate. Take pictures, write down every donation, and save the receipt from the donation site.
Clothes
Ladies, I’m looking at you as I know you’re looking at that closet of yours with big eyes. Nope, you don’t need 20 pairs of shoes. And that “favorite” dress…how many times did you wear that? Imagine what your life looks like as a full-time RVer. Do you really need 20 sweaters, 30 shirts? Are you going to wear all 10 pairs of heels while you go hiking or walking around the campground?
I went through my closet four different times. The first time I purged all the clothes that didn’t fit me. You know, those jeans that are too small that you’re working to get back into? The second time I purged all of the clothes that I haven’t worn in the last year. That included a lot of dresses that are saved for “fancy occasions” because really, I probably only need one dress for a fancy occasion, not ten. The third time I purged all of the clothes that I just don’t absolutely LOVE. After three times through my closet, it already looked pretty bare. The last purge I did was after we moved into the RV and realized not everything was going to fit, haha! Even after full-time RV living for a few months now, I realize I still have more clothes than what I need.
Kid clothes
If you have kids, you’ll need to purge their clothes too. Basically, I kept 7 bottoms and 7 tops for each kid per season. So, 7 tops/bottoms for cold weather, and 7 tops/bottoms for warm weather. Then, they each have a jacket, a coat, 1-2 bathing suits, and 3-5 sets of PJs. I kept most of all of their undies and socks because accidents happen and socks go missing all the time. And each child has 4-5 pairs of shoes for all seasons. Athletic shoes, crocs, boots, and sandals. I keep one season of clothes in a storage bin that we store in the RV and the current season of clothes in their dresser.
Organize
A big part of purging is re-organizing everything you are keeping. I love Sterilite bins! I use these for all of our organization in our RV. Bins for first aid, medicine, batteries, office supplies, school supplies, etc. So, take that big ole stockpile of first-aid supplies and medicines that you have and consolidate it down to only what you need. Organizing all the little things into storage bins in advance makes moving these items into the RV easy!
Kitchen
Downsize your kitchen items. You do not need all the bakeware, serving dishes, pots and pans, and gadgets that your current kitchen holds. And honestly, you won’t have room for it. The key is to SIMPLIFY.
Here is a list of the things my RV kitchen has that I actually use daily or almost daily:
- 6 plates & bowls (You do not have a dishwasher, so why have more dishes than people? They would just pile up in the sink.)
- 5 coffee mugs (we use these for hot chocolate too!)
- 2 wine cups
- 5 forks, spoons, and knives, plus 4 steak knives
- 1 mixing bowl
- 2 cast iron skillets & 1 cast iron pot
- 1 baking sheet pan
- Cooking utensils: 2 spatulas, 4 spoons, 1 soup ladle, 1 tongs
- Other gadgets (only one of each): peeler, ice cream scoop, wine bottle opener, hand mixer, blender, Instant Pot, set of measuring cups and spoons, cutting board, collapsible strainer, Keurig coffee maker, toaster oven, 3 food storage containers
- eCloth dish towels (a much cheaper version of Norwex)
Again, the rule of thumb in downsizing what you have into what you’ll take into your RV is to think living simply. If you don’t use it more than once or twice a week, you can probably live without it.
5. Consider a storage unit
Even though we sold over 90% of everything we own, we still keep a very small storage unit in Texas. This holds Chris’ tools (he is a handyman and still uses them), files and records we need to keep, sentimental items like photos and photo albums, our collection of Christmas ornaments, and some bins of hand me down clothes for the kids that are for the next season or size.
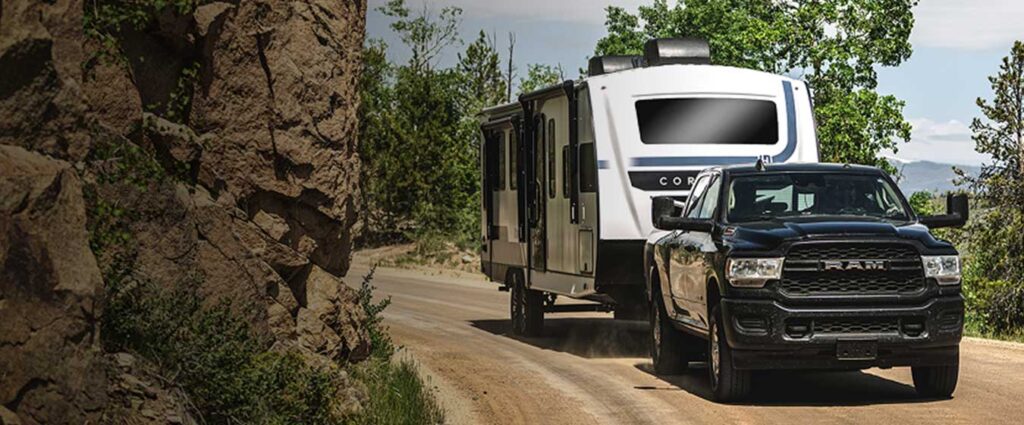
6. Buy your RV first, THEN the towing vehicle
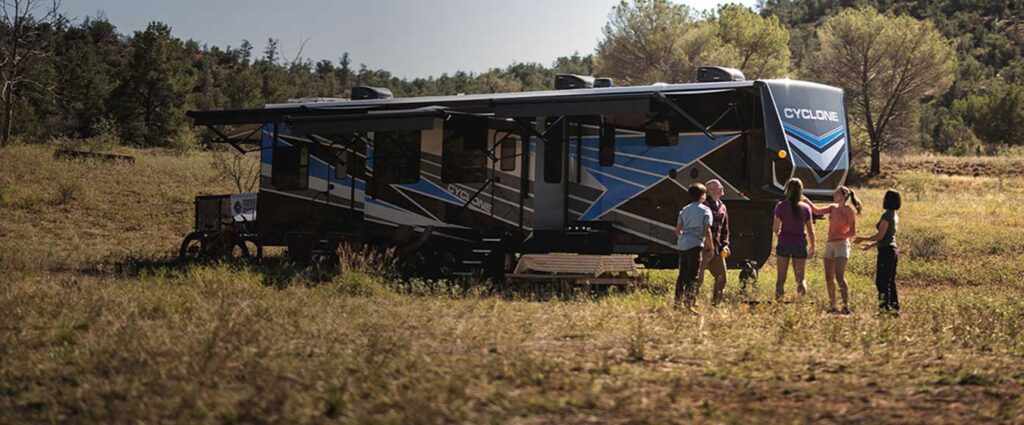
There are all types of RV options out there, and what you look for all depends on what is right for your family. A toy hauler might just be what you need if you are traveling with “toys” or just a lot of kids with toys, ha! But maybe you prefer a bunk room instead, and then you have to decide if you want that room in the middle of back of the RV. Or, maybe for full-time RV living, you even prefer a Class A or C, which is more comfortable for driving.
All that to say, it can take weeks or even months of research to find what RV is best for you. We even recommend using a company like RV Share to rent the brand and style RV that you are interested in, to test it out. If you purchase the RV right at the dealership, then you’ll have your RV in a short period of time, after paperwork, payment and inspection are complete. If you choose to order yours from the factory, like if you need something more customized than what the dealership offers, then you can expect a longer wait time to get your RV.
Read all about our journey in how we chose our rig here.
If you are planning on buying a fifth wheel or trailer, you’ll need to get a truck to tow it. A good rule of thumb is to buy your RV first, and then the truck. In this case, buying the cart before the horse is a must. Different RVs require different towing capabilities based on weight, hence why you need to purchase the RV first.
Since the RV industry is booming right now, there is a high demand for trucks. We decided to buy a used Ford F350 to get a better price. The search for the specific truck we were looking for was actually a little difficult and took several weeks. Be willing to drive a ways to get the truck you actually want. We went 2 hours away multiple times to find the correct one.
Obviously, once you get your new vehicle and RV, you will need to purchase insurance. You will need to find an insurance company that provides coverage for full-time RV living. We purchased our insurance through Geico.
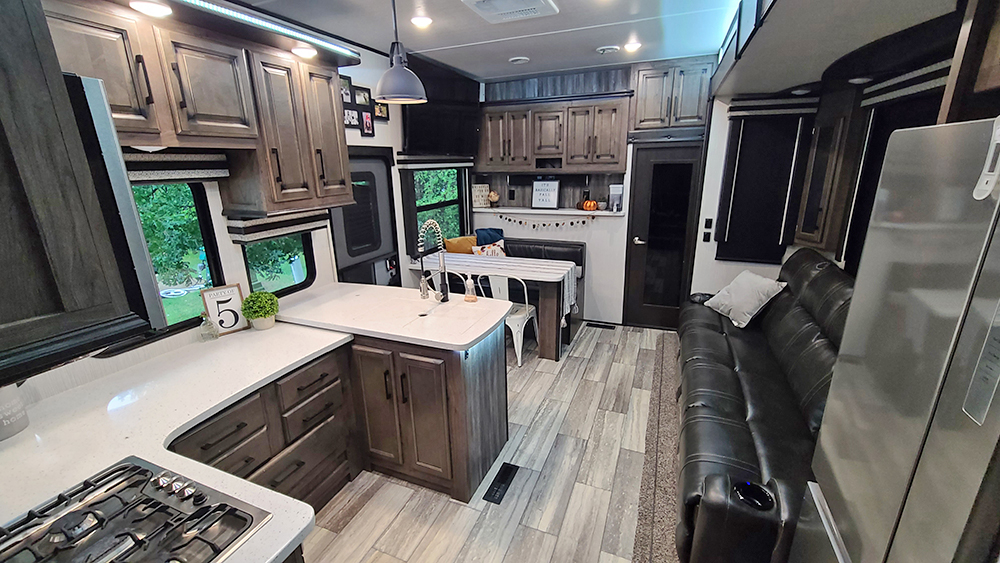
7. Purchase items for the RV
Washer/Dryer
We knew we would have an onboard washer and dryer since we would be full-time RV living with kids and needed the convenience of doing laundry in our home. Our master bedroom closet came equipped with a washer and dryer hookup. We bought a Splendide Washer and a Panda Dryer. I’ve been very surprised and pleased with how much they can hold and how well they work!
Water Filter
Having quality drinking water on board was also a must-have. We installed our Clearsource Ultra RV water filter system and it is the cleanest water we have ever had. It filters water down to .2 microns, so we don’t have to worry about what water source we are connected to; we will always have quality water to drink and bathe in.
Furniture/Storage
We also purchased a few furniture/storage items for the toy-hauler room. We bought a dresser, desk and storage cube shelf.
Other
There are a few other things that are necessary for full-time RV living:
- B&W Hitch: We have a 25K Companion Fifth Wheel Hitch)
- Rhino Flex Sewer Hose Kit: You need more length than you think because the hookup will not always be conveniently located by your dump valve. We have 40 ft since we have 2 dump pipes.
- Sidewinder Sewer Hose Support
- Fresh water hose: At least 50 feet, for the same reasons as the sewer hose.
- Dogbones: These adaptors allow your 30 or 50 amp electric cable to plug into 15, 20, or 30 amp shore power.
- Locks: For your hitch, toy garage door, and kingpin. The last two are RV specific.
- Tire pressure gauge and air compressor. A small tire inflator does work but takes a long time.
- Wheel chocks and leveling blocks
- Basic tools: To do minor repairs and maintenance.
- Tie down straps: To secure loose furniture or items on move day.
- Patience and flexibility: (Not found on Amazon.)
8. Set up mail forwarding/delivery and bill payments
The mail dilemma. How will you receive mail when you’re full-time RV living? There are quite a few options, but it’s really about what will work for your situation.
For us, we have our mail sent to my parent’s address, which was only a few miles from where we used to live, and where our storage unit is. Since we are already Texas residents, this made our process of becoming full-time RVers much easier. We chose to use their residence as our permanent address for homeschooling, voting, and other purposes. They are so kind to sort through it and send us photos of our mail so we know if we have bills to pay. Thanks, Mom! We tried to switch everything over to online payments so that my parents don’t accumulate too much mail. There are some random bills that come like medical bills and toll charges that we need to stay on top of. For us, this is what works well with the type of traveling we do.
Not all RV parks allow you to forward mail to their park, FYI. So, another option is to have your mail forwarded to a local post office in whatever city you plan to be in.
There are also professional services like Escapees that provide a mailbox (with a street address) for your physical address, and forward your mail to wherever you plan to be.
9. Plan out the first few months of travel
This will look different for everyone, but having a game plan for where you want to go will make things less stressful as you start out on your journey. For us, we decided to stay at a local RV park for a month while we moved in and settled into this new way of life. Then, we decided to set out towards Ohio and Michigan for a few weeks, followed by a few weeks of traveling west to visit some national parks.
You may consider memberships to campgrounds like Thousand Trails. This membership works in a way where you pay by the region/zone and you can only stay at one particular park for 14 nights. At this point in our travels, we don’t feel like we would utilize this membership enough to make the membership cost worth it.
We decided to purchase memberships with Harvest Hosts ($79/year) and Boondockers Welcome ($50/year) which allows us to park overnight for free in locations across the U.S. This style of camping is called boondocking, which means we do not have hookups. We actually prefer this style of camping versus an RV park. Our hope is to travel as budget-friendly as we can, and a big expense of RV parks and campsites is alleviated by choosing to boondock.
So, how do you go about planning RV travels?
Maybe start with figuring out what places you want to visit. Summer in the Smokies? Winter in the southwest? That’s a great start!
We plan our tentative route with Google Maps and then research what campsites are available along the way. We use Campendium.com, a simple Google search, Harvest Hosts, or Boondockers Welcome to find campgrounds or boondocking sites along our route.
10. Set a Budget
You’ve probably heard rumors that RVing is really expensive, and isn’t a way to actually save money. This DOES NOT have to be the case. Our monthly expenses in our almost 4,000 square foot home were crazy high, and now we don’t have a mortgage, utilities, lawn service, etc. I also don’t spend $400 a month ordering things from Amazon, ha!
We chose to purchase our truck and RV in cash, so as not to go into debt. The sale of the house and everything else helped pay for both. In other words, we do not have a car/RV payment. The only expenses we have are food, gas, propane, cell phones/internet, RV park/campsite costs (which we keep to a minimum), insurance, and other extra costs (incidentals, clothing, entertainment). A budget will look different for everyone depending on your unique situation. But it is a great idea to sit down and take a realistic look at your monthly costs, and how much you plan to spend in each category.
11. Move into your RV
Hopefully, you can plan to get your RV before you close on your house, and take your time to move items in and organize. That way you can figure out what items fit or don’t fit, what you may need to purchase in order to organize and use the space efficiently.
Now that you have your RV and have moved everything in, make a trial run camping trip (or two!). Somewhere not too far away so that if you need anything, or if something goes wrong, you can just come back. A trial run camping trip will help you figure out what items you may still need to get, help you establish a setup/tear down checklist, and understand what you may still need to organize or rearrange. Your trial runs will even expose what you didn’t know about your RV or the things you have already forgotten since being told at the dealership about the operation of systems.
Yes, you need a checklist! A checklist is a list of things that need to be done to the RV in order to pack up and leave, and it will be unique to you and your setup. Essentially, you’ll have a checklist for the inside of the RV, and outside. If you do not follow a checklist, severe damage or injury can occur. A simple mistake, like forgetting to put the front jacks down because you’re distracted can lead to a crushed truck when your rig falls on it (speaking from experience on that one!). Generally, I complete the inside checklist and Chris completes the outside checklist. Here is our own Moving Day Checklist.

Lastly, understand that there will be things that go wrong in your RV or things will break, or you’ll make a rookie mistake (…or two, or three). There is a learning curve to starting this new lifestyle. Plans will be thwarted by problems. It will be frustrating at times. It happens to everyone. Just learn from the mistakes, stay flexible, and learn to laugh. Enjoy the journey, good luck on your travels!
This story first appeared on The Flying Hens.